This adorable 3D Christmas Tree Perler Bead project is a wonderful project for kids to do in preparation for the holiday season!
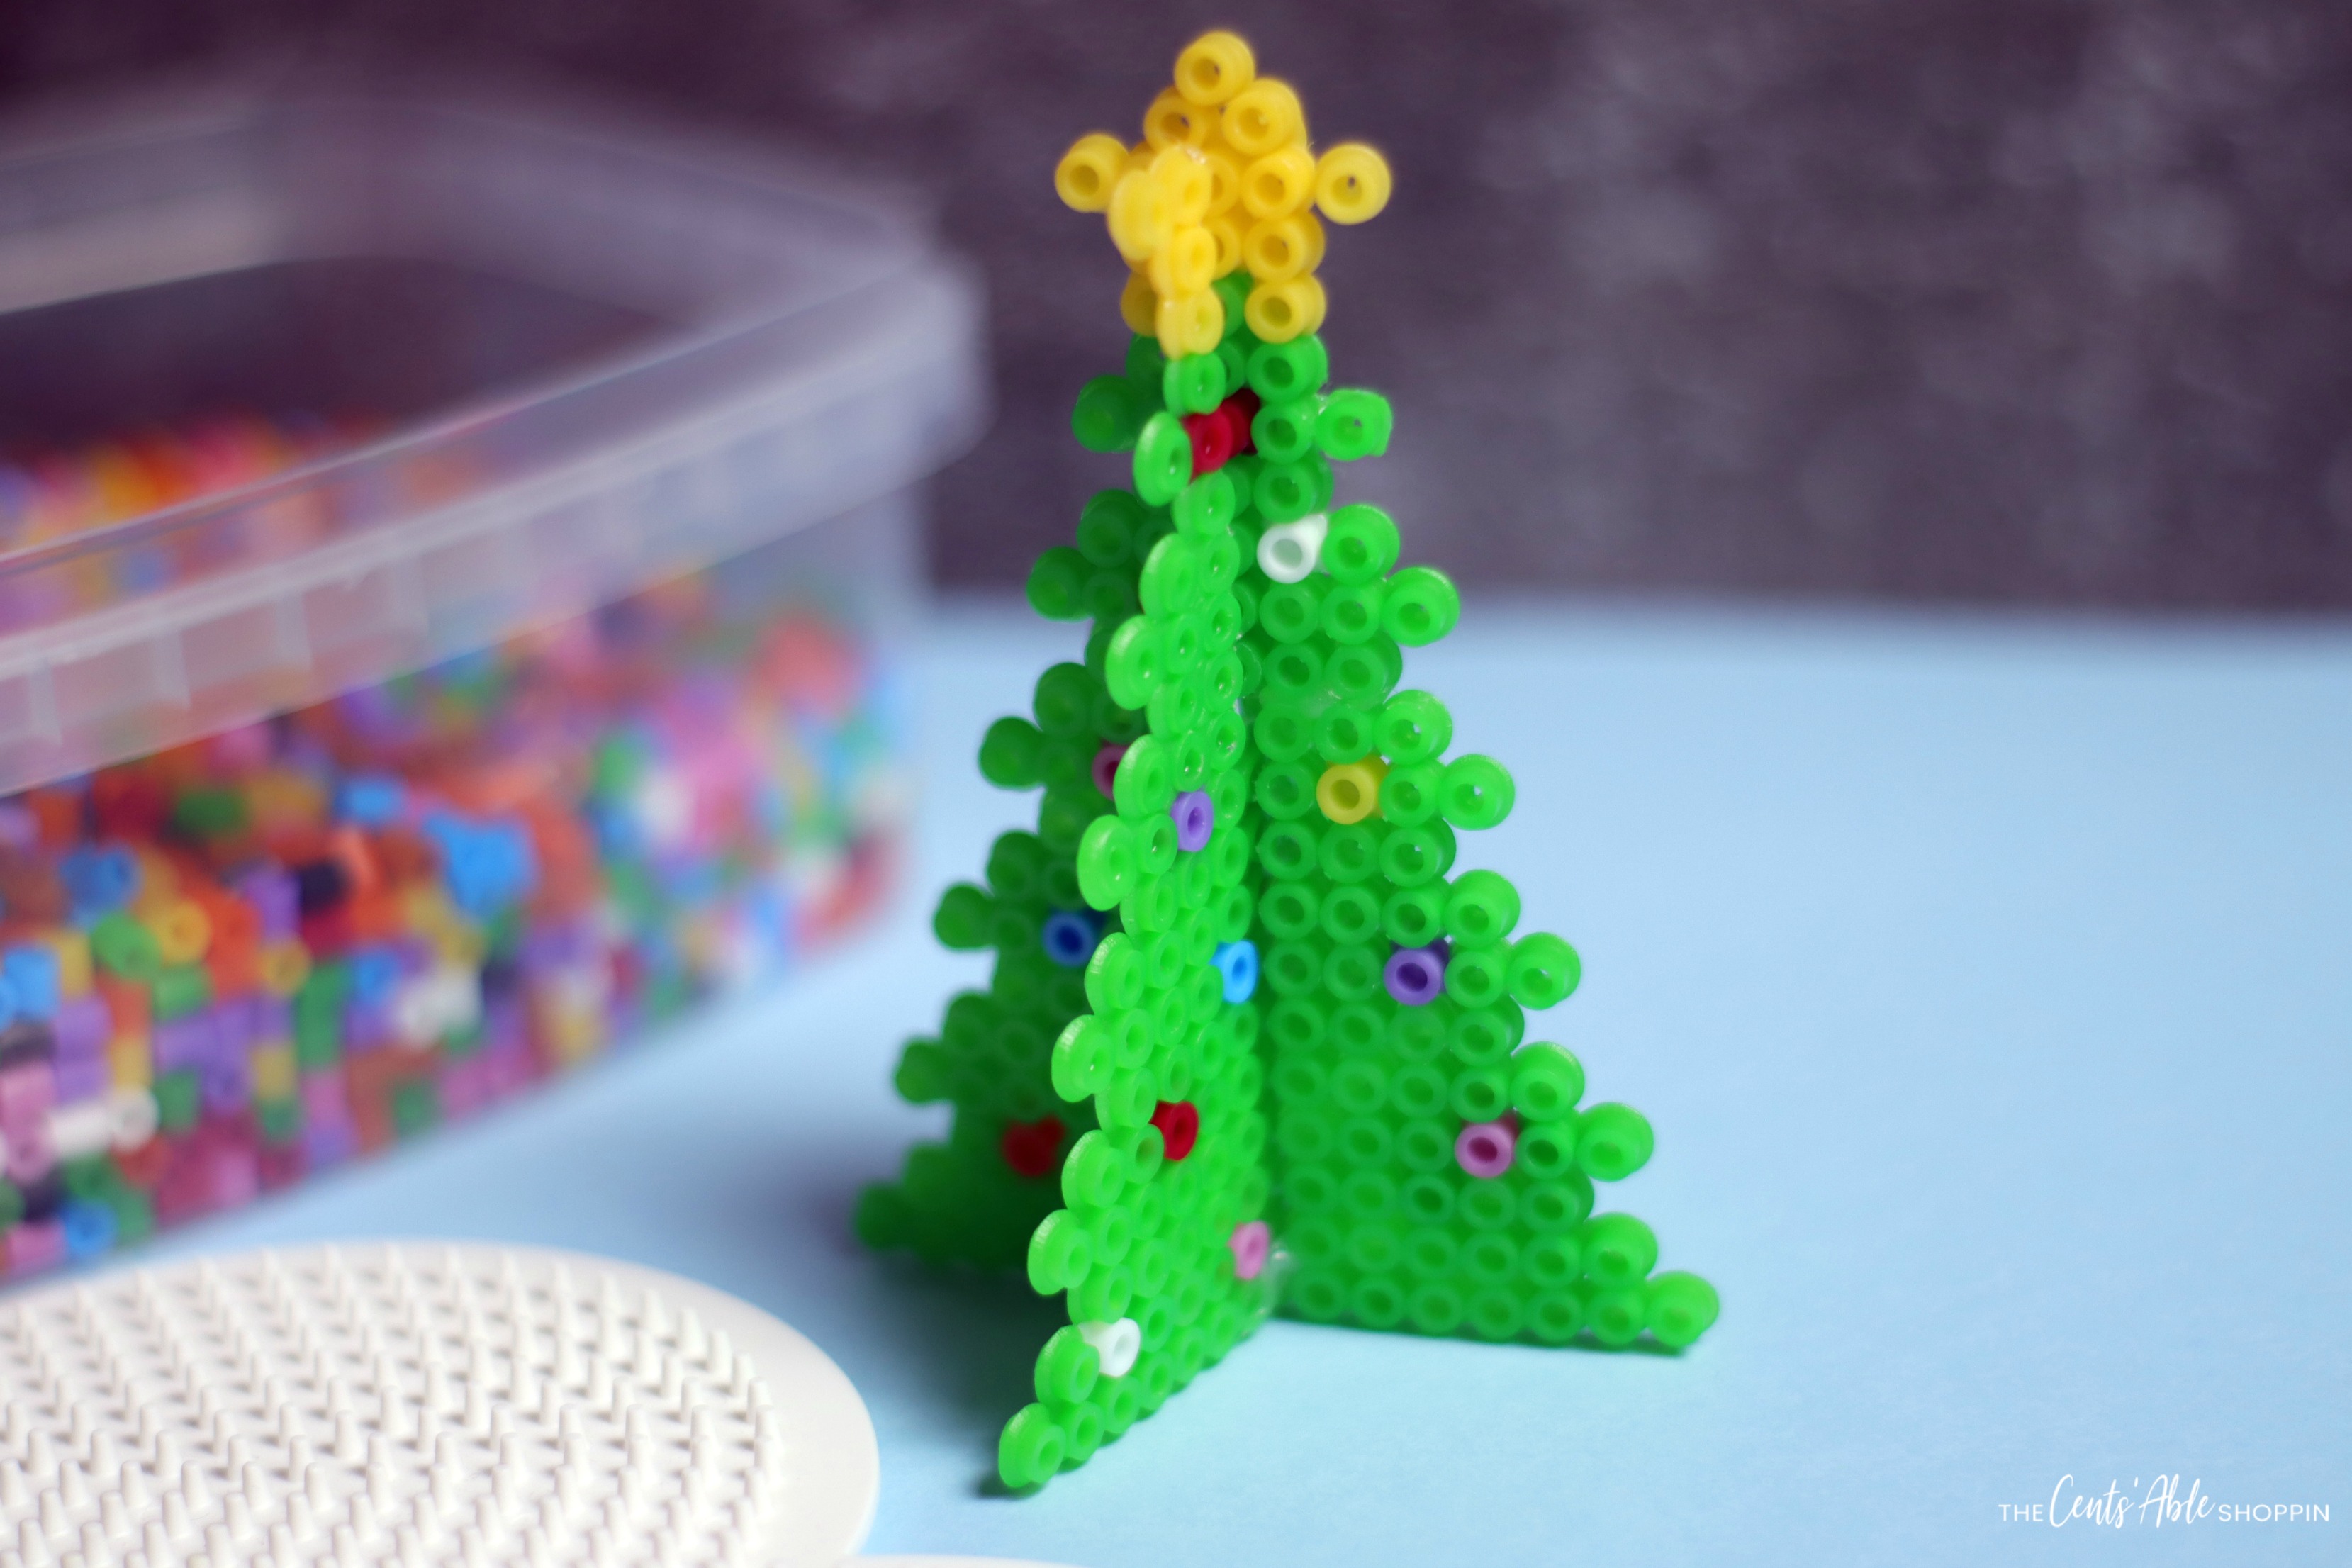
The holiday season is right around the corner and it won’t be long until the kids ask to put up a Christmas Tree complete with all the trimmings.
While you can find Christmas tree stands up all over my area of town, this Christmas tree is different. It’s made with perler beads! No cleaning up needles.. or watering, and best of all, no dragging down from the attic (or garage!)
Pull out the tub of perler beads and follow the simple instructions to make two Christmas trees. When you’re done, both trees will slip together to make one 3D Christmas Tree that your kids can display at home. This craft would be such a fun project for a classroom of kids or even a sleepover for teens, too!
3D Christmas Tree Perler Bead Project
Materials required:
(Disclaimer: This post includes affiliate links for items at no additional charge to you.)
- Yellow: 22 piece
- Red: 3 piece
- White: 3 piece
- Pink: 4 piece
- Purple: 3 piece
- Blue: 4 piece
- Orange: 2 piece
- Green: 250 piece
- Perler beads
- Wax paper
- perler bead pegboard
- Iron
Instructions:
This Christmas Tree project includes the video instructions for two Christmas trees. At the completion of the project, one tree will slide on to the other tree to make a 3D Christmas Tree out of perler beads.
It’s such a fun project for kids of all ages.. though the smaller kids might need a little extra help from mom or dad as they go!
Get started by counting out the beads and setting them aside. I like to do this in a separate dish that’s placed on a towel (to prevent the beads from rolling off the table!) If you have really small kids, make sure that the beads don’t go in the mouth!
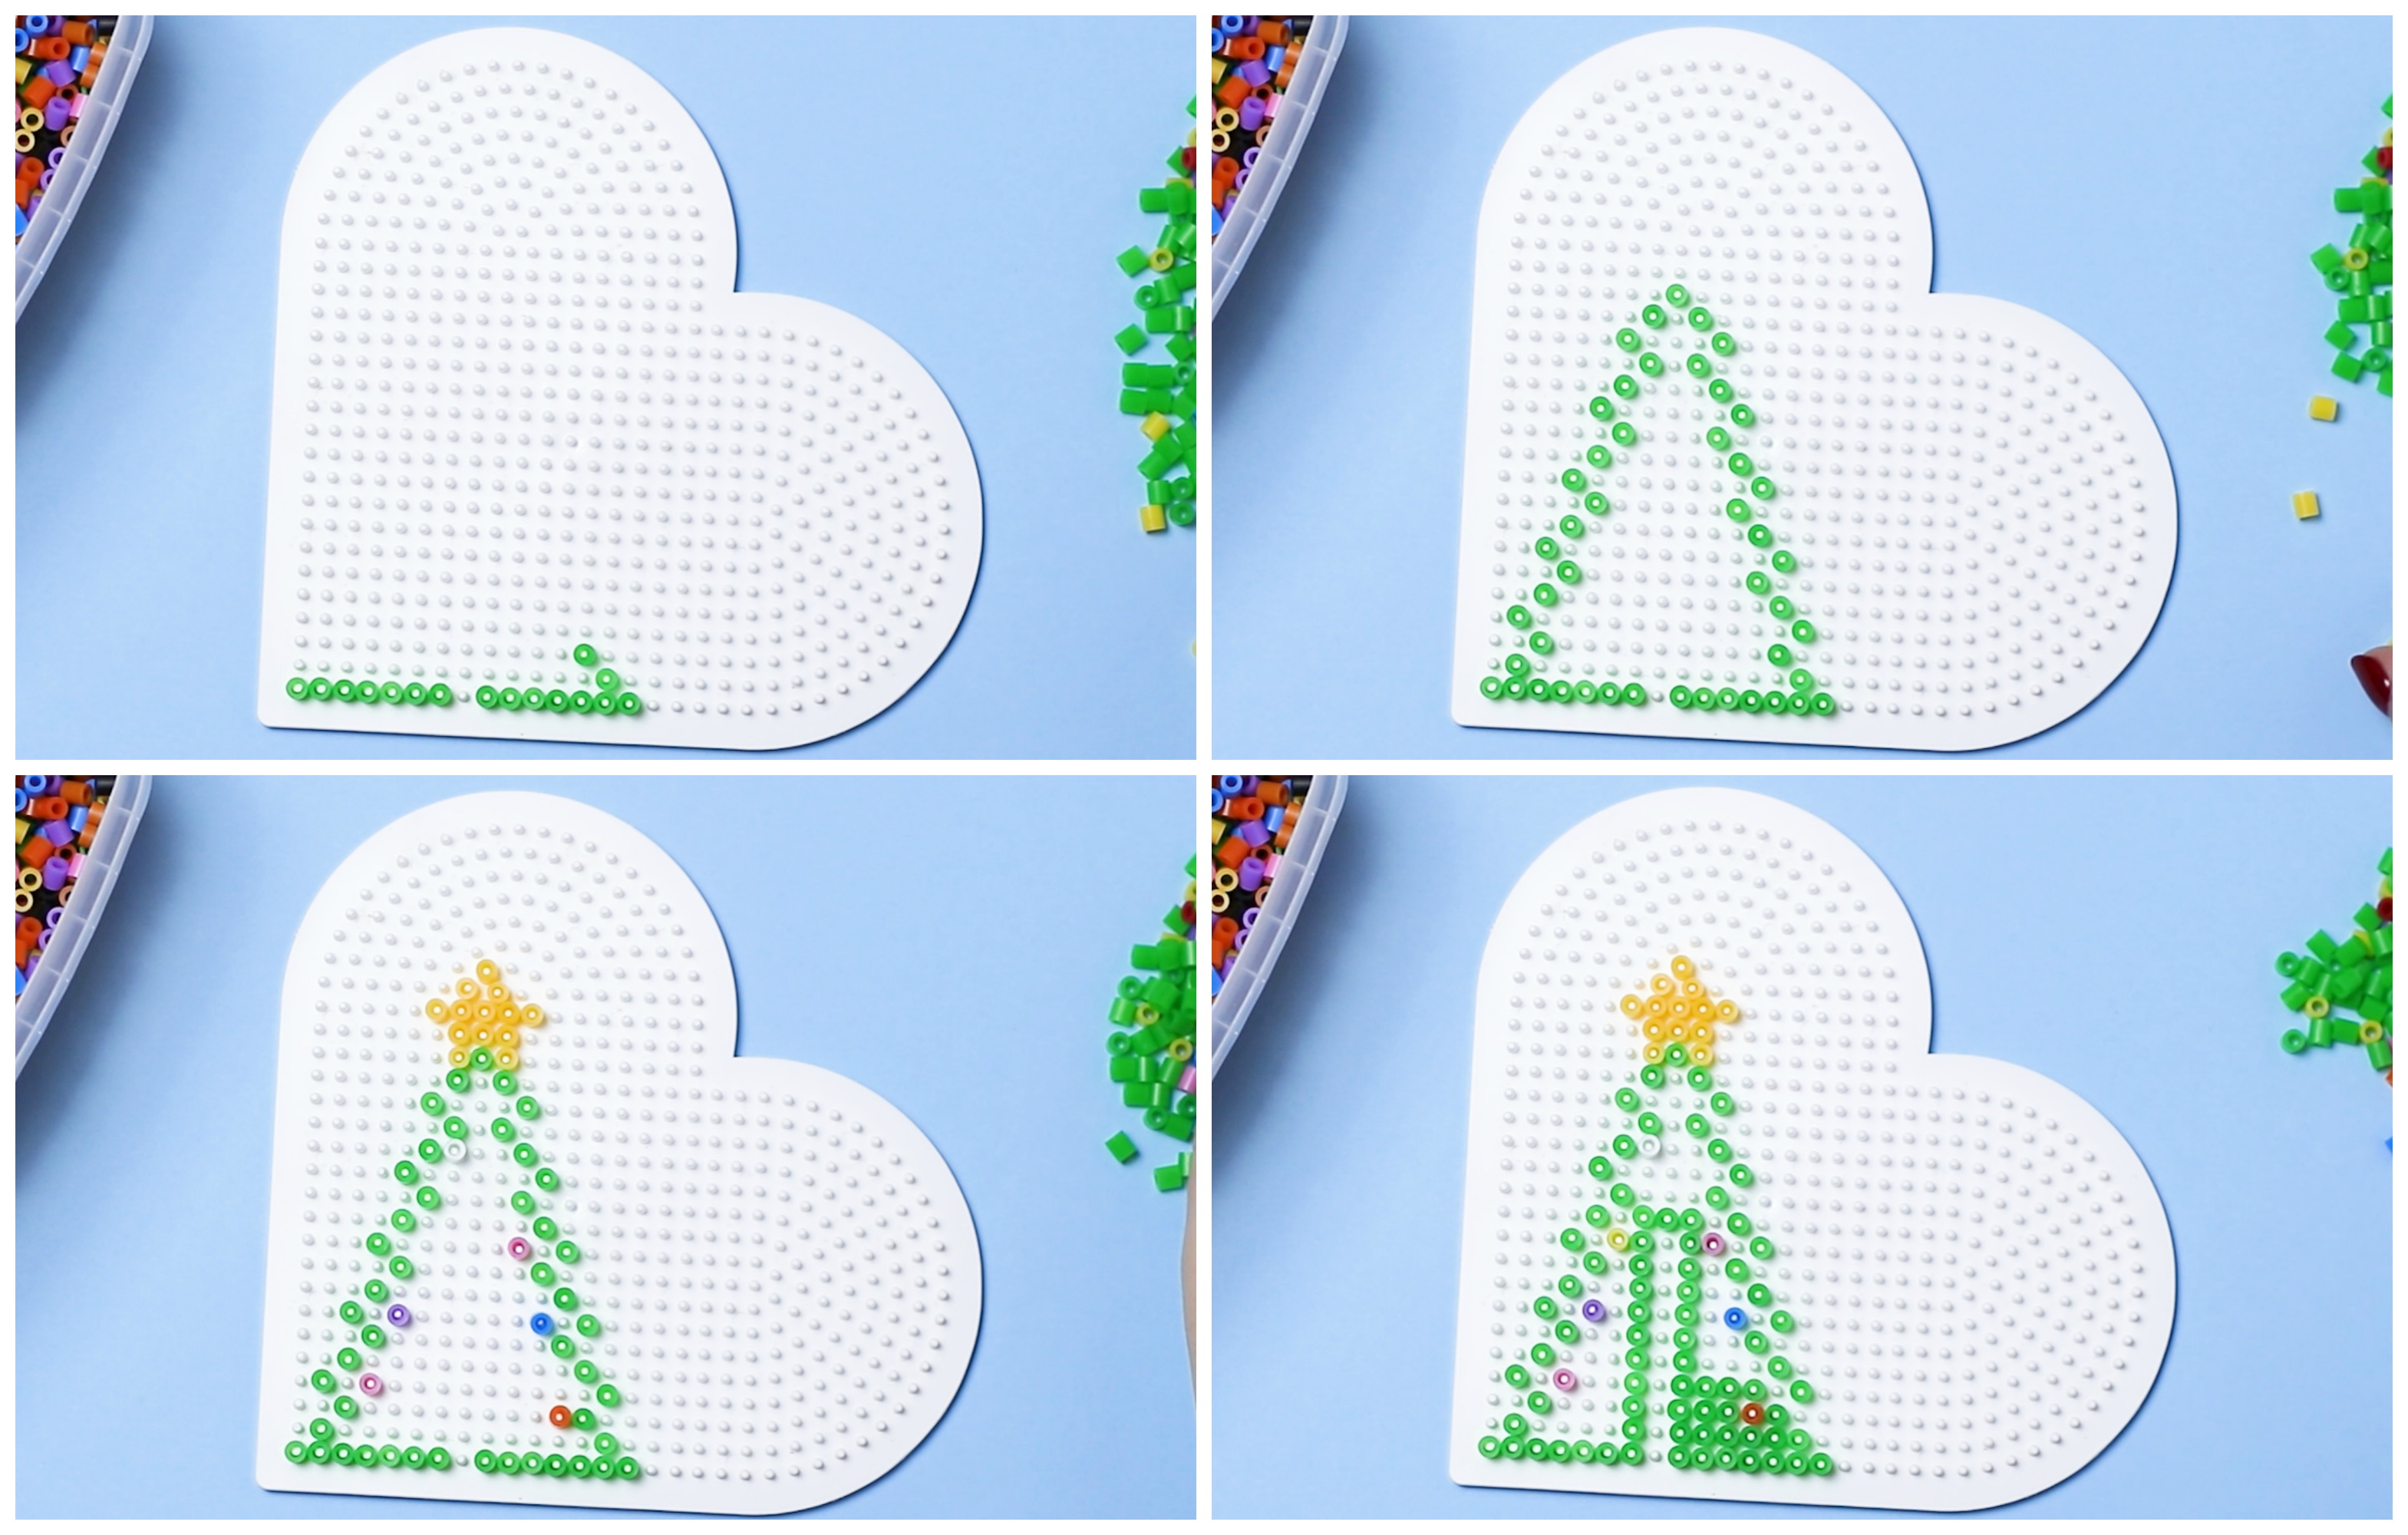
Begin by laying the green beads out to make the bottom of the tree, taking care to leave a gap in the center. Fill in the middle with a few colors (ornaments) before adding the rest of the green beads and star on top.
Once the first tree is done, get started on the second. This tree will have a gap on the top (so both trees will slip together at the end!) Similar to the other tree, fill in with some colored ornaments and a star at the top.
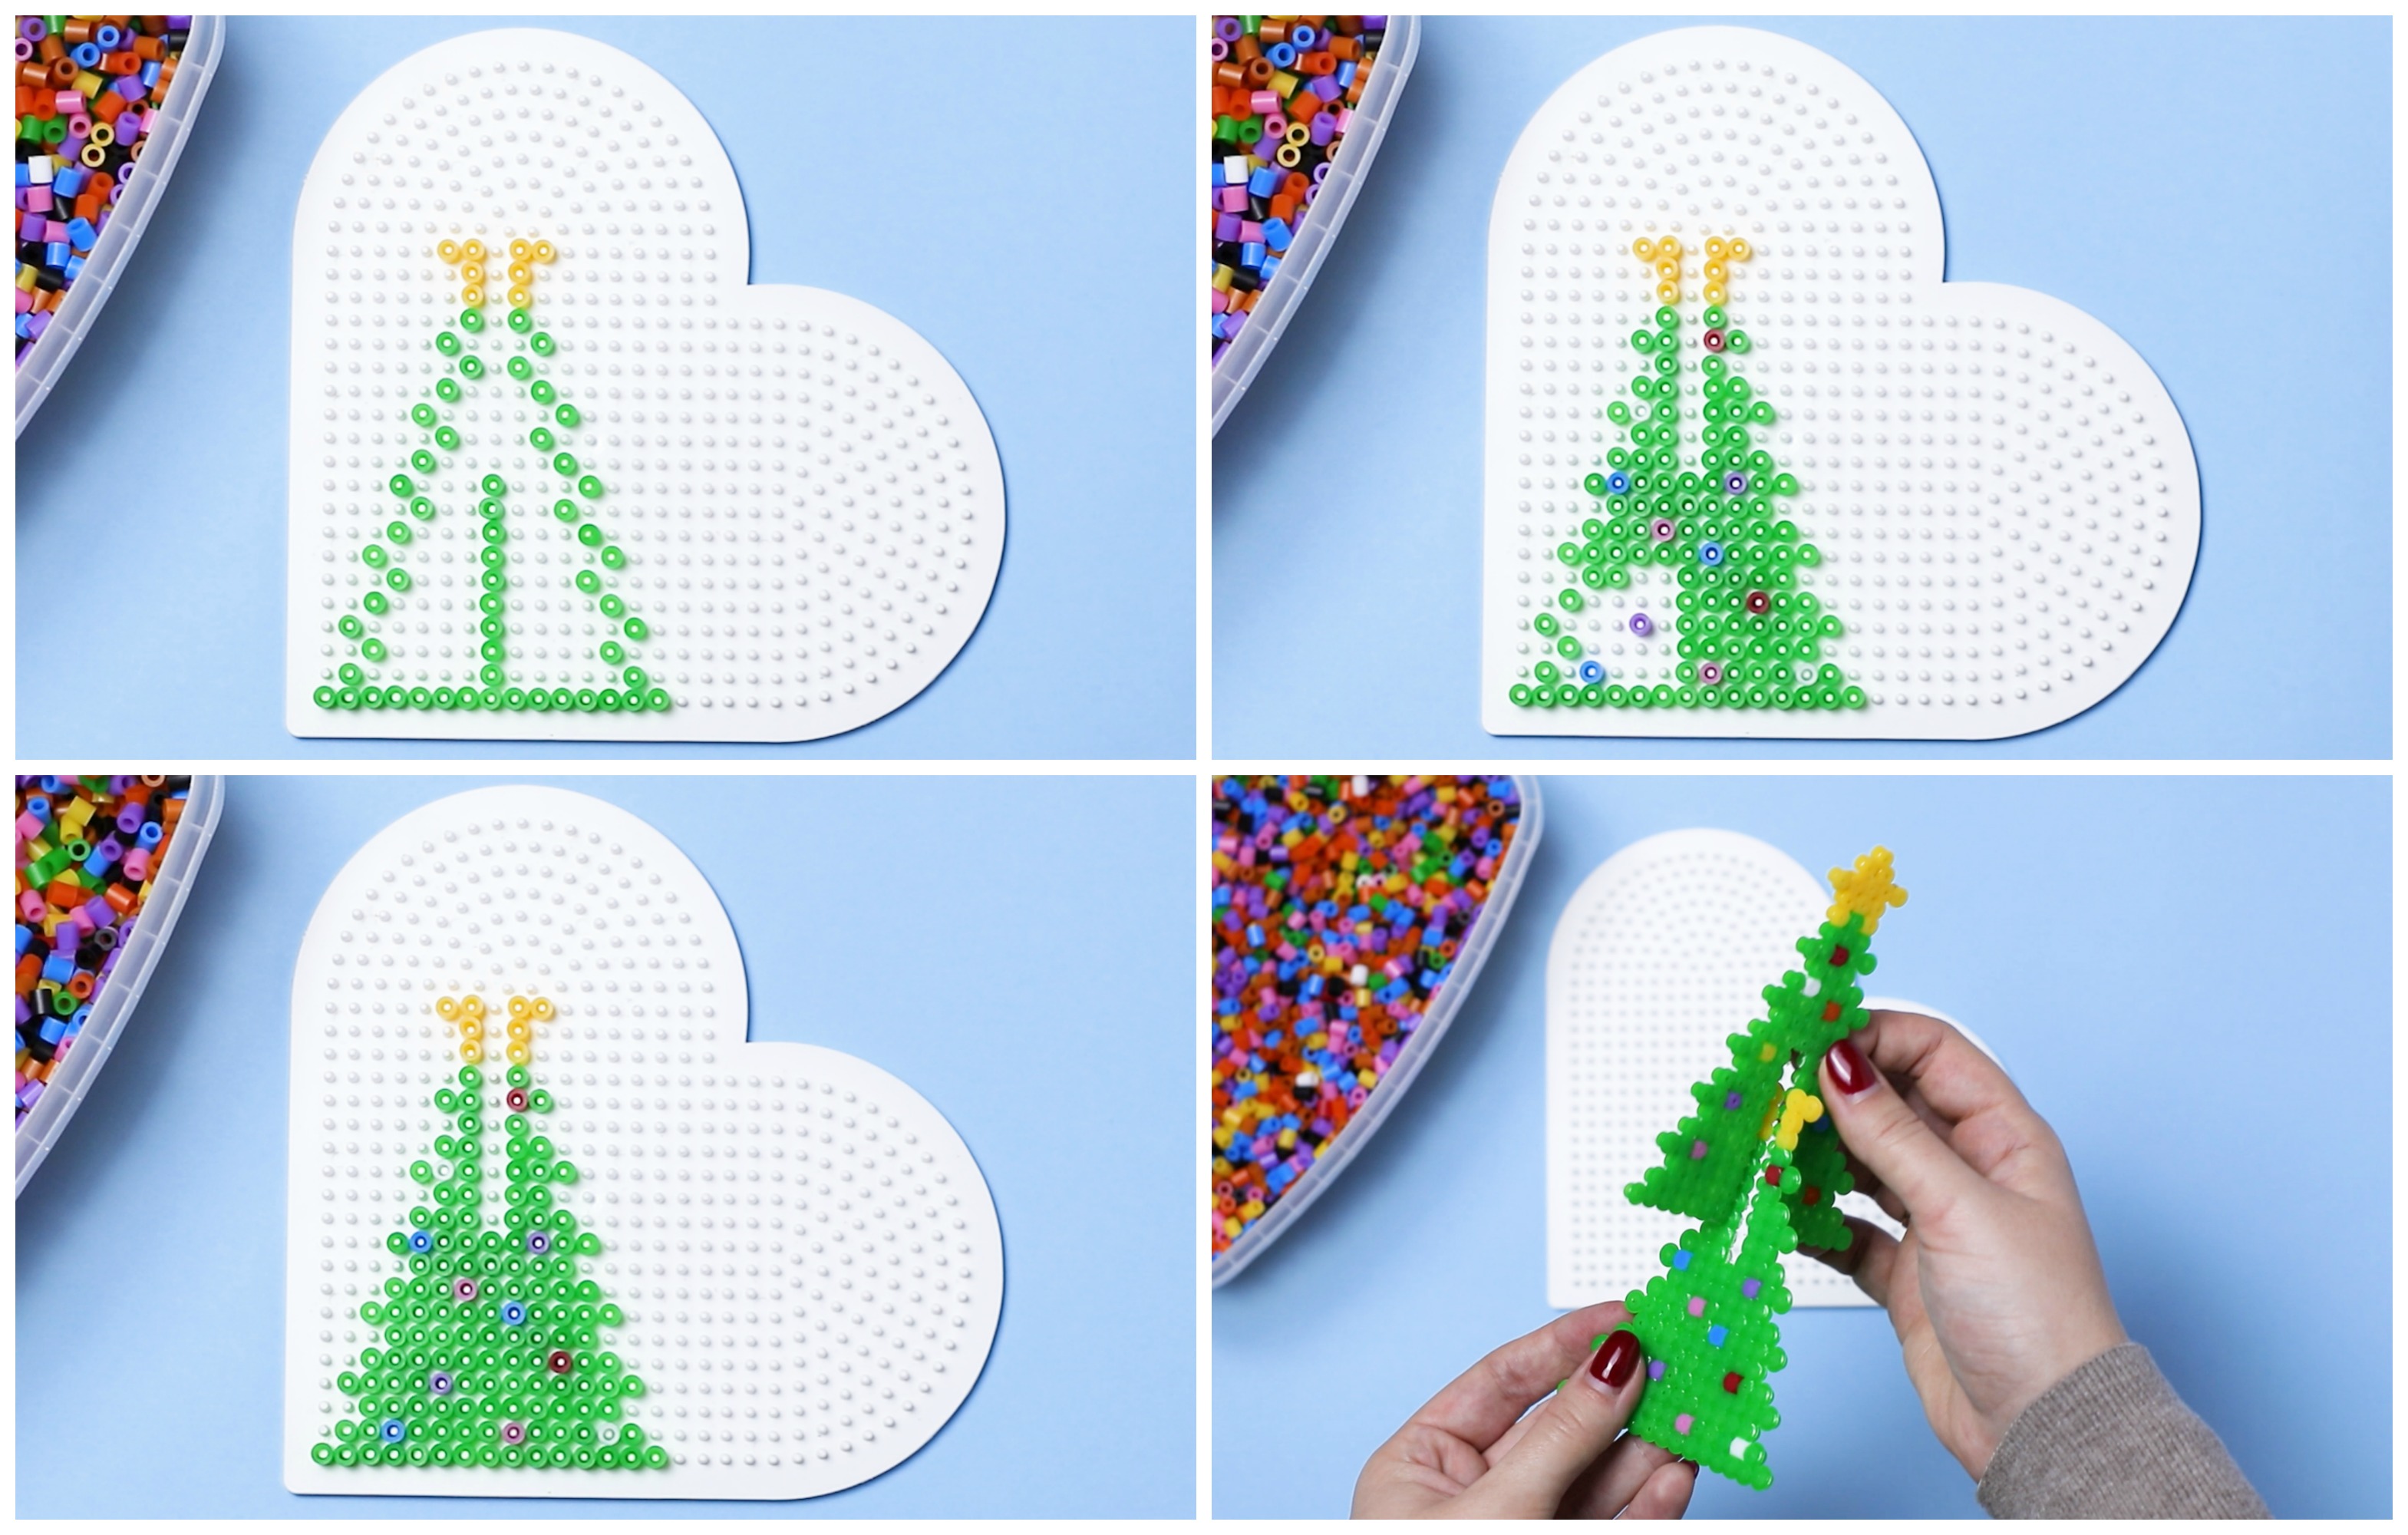
Once you have completed both trees, lay your wax paper atop and gently press with a warm iron for 30-35 seconds. Avoid over-pressing because the beads will melt.
Allow the wax paper to cool. Then flip the beads and gently iron the other side (20-30 seconds). Once you are done, repeat the process for additional Christmas Trees. Once cooled, slip one tree on to the other tree to make a 3D Christmas Tree.
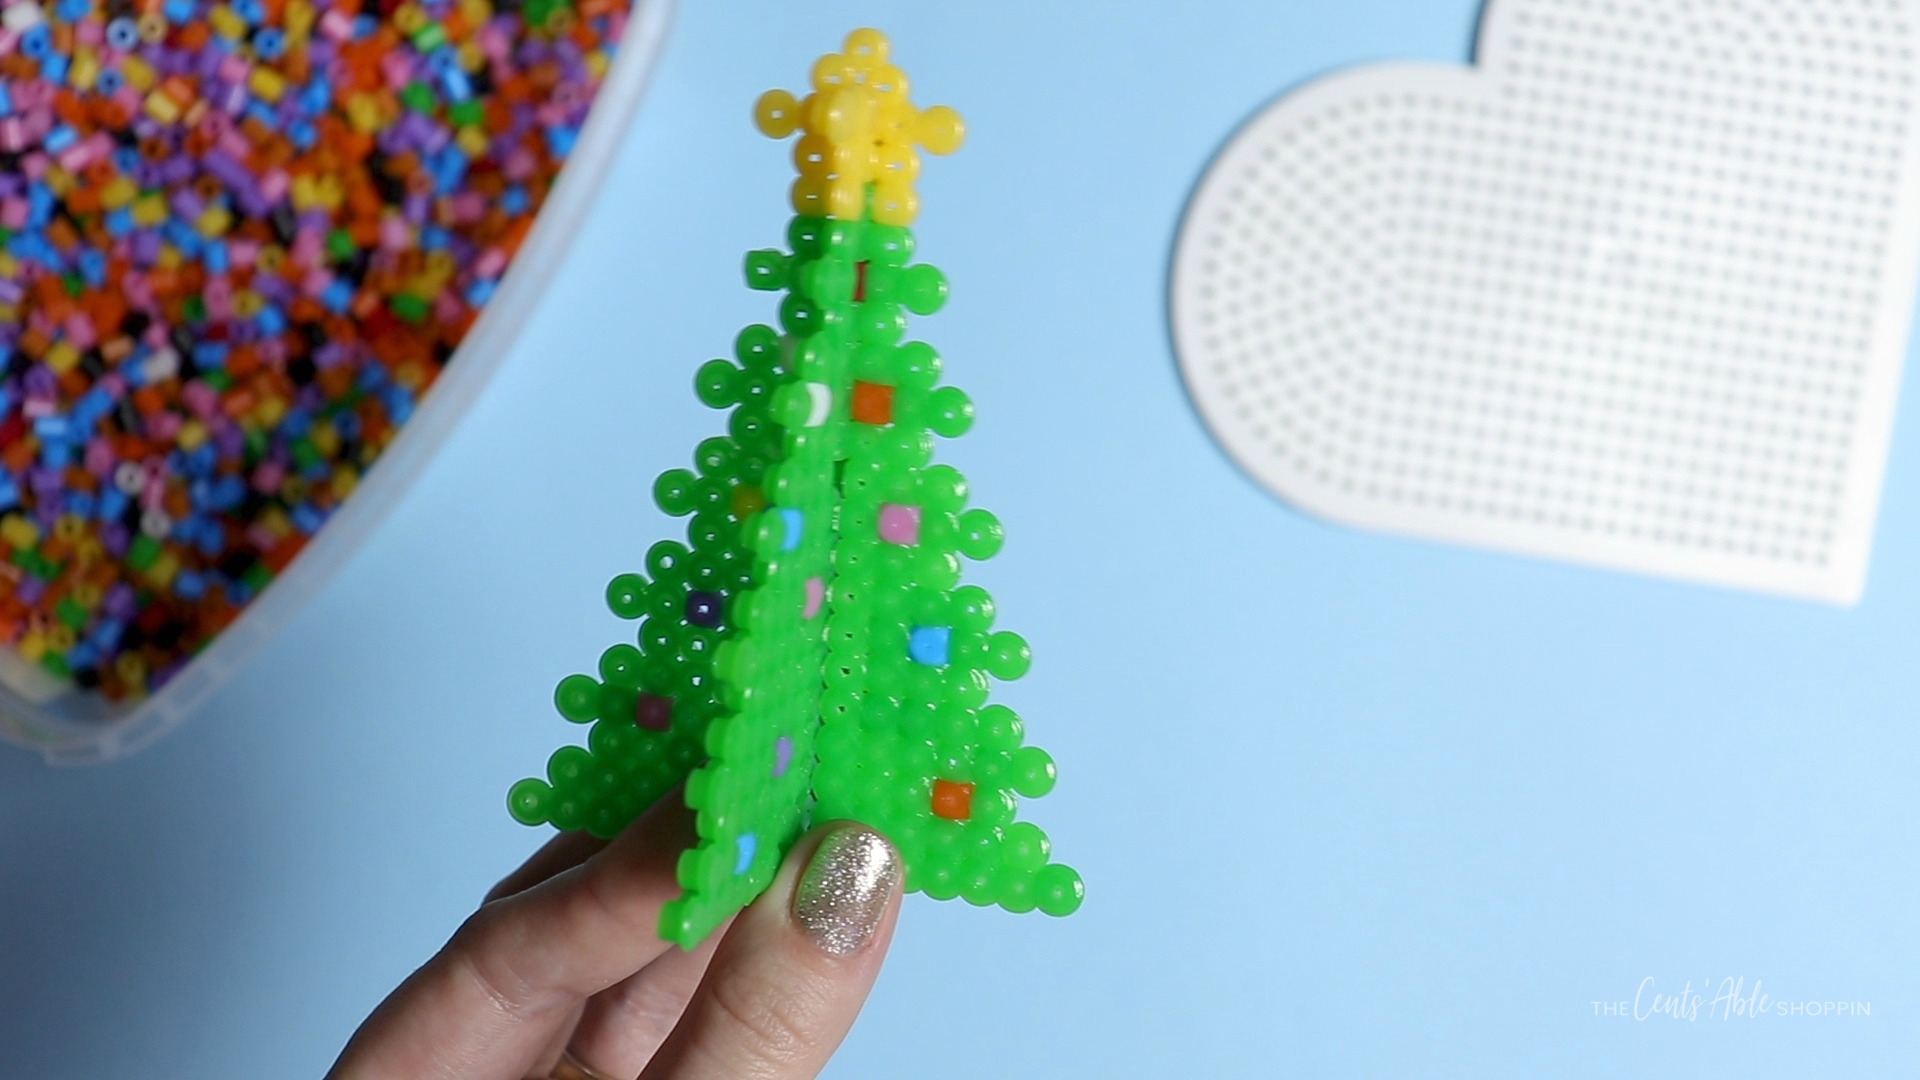
Display your finished tree on a shelf, or a Christmas Tree display with a city of houses.
Looking for more perler bead projects?
- Cute Perler Bead Unicorn
- Perler Bead LEGO Minifig
- Fun Kids Perler Bead Flamingo
- Perler Bead Earrings
- Perler Bead Christmas Stocking



[…] 3D Christmas Tree Perler Bead Project from The Cents’ Able Shoppin The kids will love making these 3D Christmas trees. […]